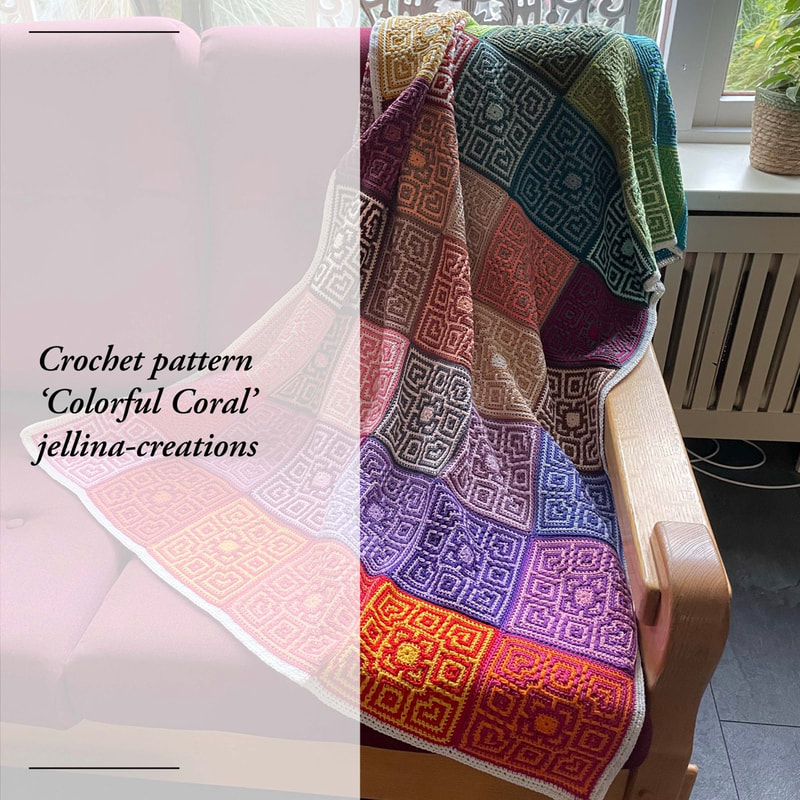
 Long time agoEven though it seems like I have been sitting around lately, I have actually been pretty busy making new designs. Due to different circumstances, the release of new patterns are postponed. In this case the delivery of the Scheepjes Catona Colourpacks got delayed. Which is a bummer, because I would love to show it to you. So I decided to release the pattern anyway! I think a lot of people got a colourpack lying around, so this is the perfect pattern for that! Moreover, crocheting squares is possible in many different colours and types of yarn, so you're not necessarily dependent on a colourpack. ---------------------------------- Het lijkt alweer eventjes geleden dat ik wat nieuws ontwierp, maar niets is minder waar. Ik ben nog altijd druk bezig alleen soms laat het uitbrengen van een patroon even op zich wachten door omstandigheden. Zoals in dit geval de levering van de Scheepjes Catona Colourpacks. Dat is jammer want het patroon is zo leuk en ik wil het zo graag aan jullie laten zien dat ik toch maar heb besloten om het alvast uit te brengen. Ik denk dat er veel mensen zo'n colour pack thuis hebben en wachten op het juiste patroon en dit kan het juiste patroon misschien wel zijn! En bovendien is zo'n vierkantje in heel veel verschillende kleuren en garen mogelijk, dus helemaal afhankelijk van een colourpack ben je nu ook weer niet. 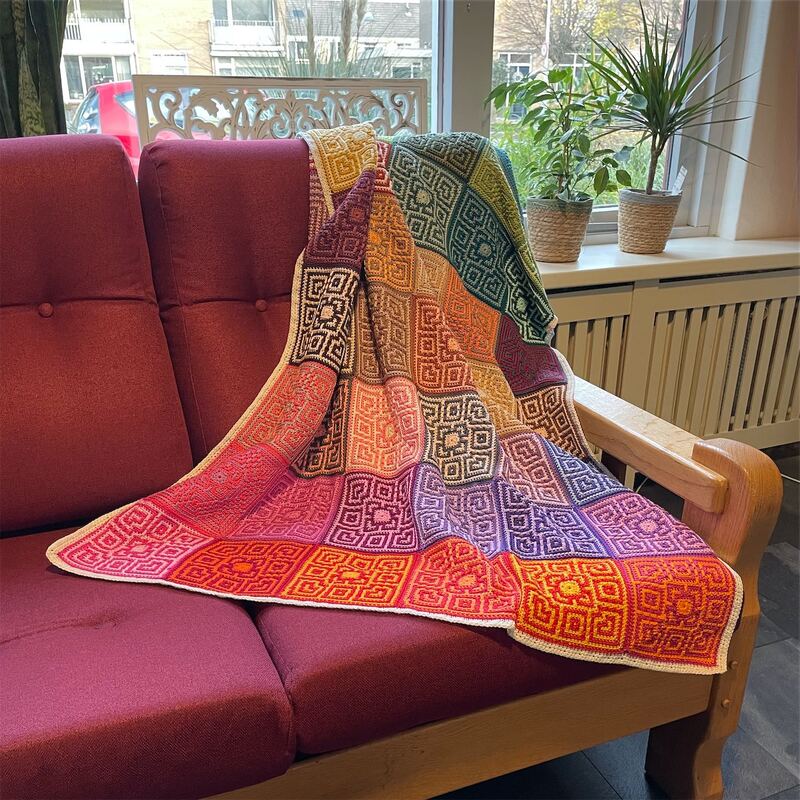 StorytimeThe story of the blanket. It started in fall 2020. On social media, there was a sudden rise of posts on mosaic crochet. This was probably because Tinna Thorudottir Thorvaldar organised a CAL. She is mainly known thanks to her clear videos on mosaic crochet. Her and Tatiana from Lilla Bjorn Crochet have both influenced and inspired me, even though they both make use of real different techniques. I've always adored this technique and I have dipped my toes into it for the Scheepjes Cal of 2019, but since last fall I really got into it. To get used to this technique, I have crocheted many test pieces and have looked at patterns of other designers. I did this because it's a different way of creating patterns. For more practise, I crocheted a scarf in the 'traditional' way, a round pencil case and finally a blanket which consists of squares. I elaborated on the last one, so now you can make it yourself! -------------------------- Het verhaal achter de deken. Het was najaar 2020 en op social media zag ik opeens veel meer informatie over mozaiek haken dan ik daarvoor zag, hoogst waarschijnlijk omdat Tinna Thorudottir Thorvaldar een CAL organiseerde, en zij is voornamelijk door haar duidelijke video's een bekende in Mozaiek haak wereld. Samen met Tatiana van Lilla Bjorn Crochet, welke weer een heel andere techniek heeft zijn dat mijn 2 grote voorbeelden en inspiratie bronnen. Ik heb deze techniek altijd heel mooi gevonden en heb hem zelfs al wel een beetje gebruikt in de Scheepjes Cal van 2019, maar pas vanaf het najaar ben ik er echt ingedoken. Ik haakte proeflapjes en bekeek patronen van andere ontwerpers. Want het is een hele ander techniek die ik gewend ben en dus ook een heel andere manier van patroon schrijven. Om te oefenen haakte ik een sjaal op de 'traditionele' manier, etuitjes in het rond en eindigde met een deken van vierkanten. En deze heb ik uitgewerkt zodat jullie hem ook kunnen maken! Different techniquesIn mosaic crochet, there are many different techniques. The end goal is creating a pattern or an image in your piece. I have always used the tapestry technique for that, but this could be taxing on your hands and shoulders, as you've got to keep paying attention to the trailing wire. With mosaic crochet you don't have that problem, as you only make use of 1 colour in each row and there's no trailing wire. You crochet the entire project in single crochets. The patterns/images are created by crocheting a (lowered) double crochet above the single crochets of the previous row. In this way, the previous row is covered, so that the single crochets will take on the colour of the double crochets. There are 2 ways to do this. The first way is to go both ways in single crochets. On the spots where you want the double crochets to be, you will crochet a chainstitch, so you can make a double crochet in it later. This way will minimize the need to work away the ends, as you're going both ways. I myself am not experiences with this technique. I chose for the second technique, where you start each row on the right and then finish on the left, where you cut the yarn off. You crochet in the loop on the back, and you crochet the double crochets in the loops on the front and the two rows underneath. The downside of this technique is that you will end with many threads that need some attention, e.g. by finishing them off at the edge or by making fringes. Even though this way has a downside, it is easier for me to process it. When I try to use a different technique, my brain just short circuits. I also like the look of the pattern/image in this technique better. But hey, it's different for everyone, just try it and you will see which one is more favourable for you! When you have mastered one technique, you can use the schemes for both. In my pattern, you crochet in circles, so the downside of the second technique is bypassed! You will only have to get rid of two threads, as the other two are worked away during the crocheting. ------------------------ In het mozaïek haken bestaan verschillende technieken zoals ik heb begrepen. Je wilt een patroon of afbeelding in je haakwerk, dat is het doel. Ik zelf gebruik daarvoor eigenlijk altijd de tapestry techniek, maar dit kan best belastend zijn voor je handen en schouders omdat rekening moet houden met je meeloop draad. Bij mozaïek haken heb je dat probleem niet want elke toer haak je maar in 1 kleur en je hoeft geen draad mee te voeren. Je haakt de projecten in vasten. Je patronen/afbeeldingen creëer je door een (verlaagd)stokje over de vasten van de vorige toer te haken en deze dus te bedekken waardoor deze vasten de kleur aanneemt van het stokje Dit kan op 2 manieren. De eerste is dat je heen en weer gaat in vasten, op de plaatsen waar de stokjes komen haak je lossen, zodat je hier later de stokjes in kunt plaatsen. Voordeel hiervan is dat doordat je heen en weer gaat je niet veel eindjes hebt af te hechten. Ikzelf heb geen ervaring met deze manier. Ik heb gekozen voor de manier dat je elke toer rechts begint en links eindigt en daar je draad afknipt. Je haakt in de achterste lus en haakt de stokjes in de voorste lus in 2 toeren eronder. Nadeel is dat je veel draden hebt waar je nog wat mee moet doen, afwerken in een rand of franjes van maken bijvoorbeeld. Ondanks dit nadeel is deze manier voor mij overzichtelijker, van de andere techniek maken mijn hersenen kortsluiting, ook vind ik de patronen/afbeeldingen in deze techniek mooier uitkomen. Maar gelukkig is dit voor iedereen weer anders. Voordeel is dat als je 1 van de technieken onder de knie hebt je schema's voor beide technieken kunt gebruiken. Ik gebruik dus de laatste methode. Het grote voordeel van mijn patroon is dat je in 'rondes' werkt en dus het nadeel van deze techniek (veel draden wegwerken) niet van toepassing is! Voor dit patroon werk je maar 2 draden weg, begin en einddraad en de andere twee die werk je weg terwijl je haakt. 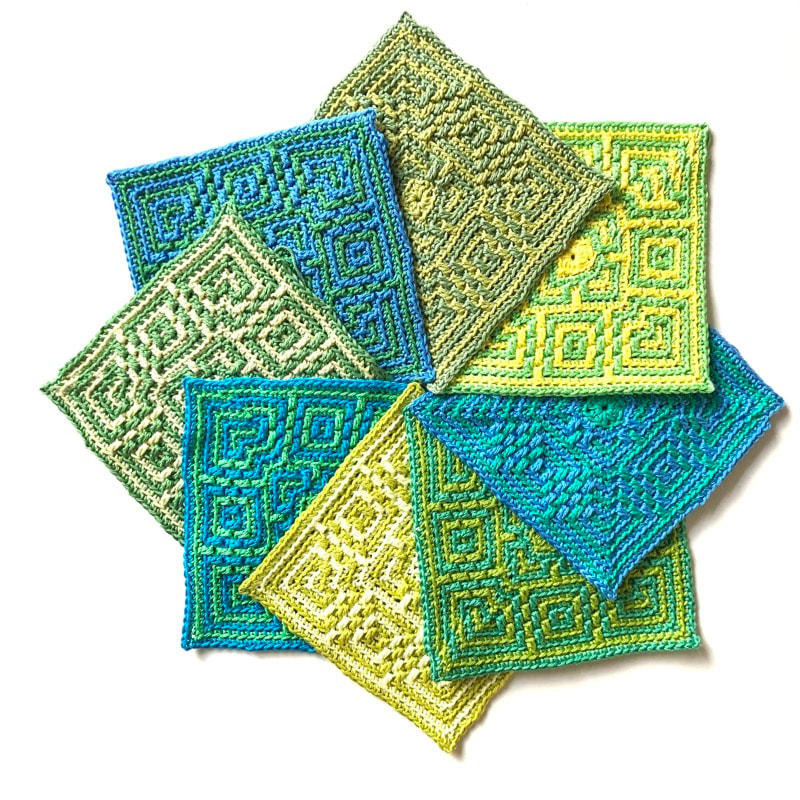 Make it biggerAt first, I planned to combine all 109 colours with 1 base colour. Black seemed spectacular. But after doing the math, that potential blanket would turn out 2 times as big as it is now, which would be exorbitant. It is a 140 x 90 cm blanket now, which is a great size for a couch-blanket. If you would like to make a blanket for on your bed, then it could be a great option to combine it with 1 base colour! You will need just as much base colour yarn as you would need the other colours, plus 1 extra ball for the border. You will end up with a blanket which consists of 108 squares instead of 54, which sounds wonderful! Who will take the challenge? --------------------------------------- In eerste instantie dacht ik om alle 109 kleuren te combineren met 1 basis kleur, zwart leek me wel spectaculair. Maar na wat te hebben gerekend kwam ik uit op een deken van 2x zo groot als dat hij nu is en dat leek me iets overdreven. Hij is nu 140 x 90 centimeter en voor een bank deken is dat een hele mooie maat. Maar wil jij hem voor op je bed maken dan is het dus een hele goede optie om hem te combineren met 1 hoofdkleur. Je hebt dan van de hoofdkleur evenveel (in gewicht) nodig als de kleuren die je gebruikt, plus 1 bol extra voor de rand. Je maakt dan een deken van 108 vierkanten ipv 54 en dat lijkt me echt heel mooi! Wie o wie gaat zich hieraan wagen? The PatternEnough talk! You probably cannot wait and I understand that ;) The pattern contains a written pattern which is supported by diagrams and many (detailed) photos. Below you can find the links to my webshop. Rather buy through Ravelry? There's also an option below. -------------------------- Maar genoeg gepraat nu! Je wilt aan de slag en dat kan ik heel goed begrijpen ;) Het patroon omvat een beschreven patroon wat wordt ondersteund door schema's en veel (detail)foto's. Hieronder de linken naar mijn webwinkel en bestel je liever via Ravelry dan vind je ook die link hieronder. You can purchase the yarn necessary using the affiliation link below. This means that the price for you is the same, but I will earn a small percentage of the price. You can support me through this and I really appreciate that! ---------------------------- Voor de benodigde garen kun je hieronder bestellen dit is een affiliatie link wat betekent dat het jou niks extra kost maar dat ik een klein percentage ontvang. Op deze manier steun je mij iets wat ik erg waardeer! I wish you a lot of fun crocheting. And I promise you won't have to wait that long anymore because my next pattern is currently being tested so it won't take that long! --------------------------------------- Dan wens ik je voor nu heel veel haakplezier toe. En ik beloof dat je nu niet meer zo lang hoeft te wachten want mijn volgende patroon wordt momenteel getest dus zo heel lang zal dat niet meer duren!
7 Comments
|
Ravelry
Wanneer je via onderstaande link je garen besteld gaat er een klein percentage naar mij zonder dat het jou een cent extra kost. Op deze manier kan ik mijn patronen gratis blijven aanbieden.
Dank je! 
|