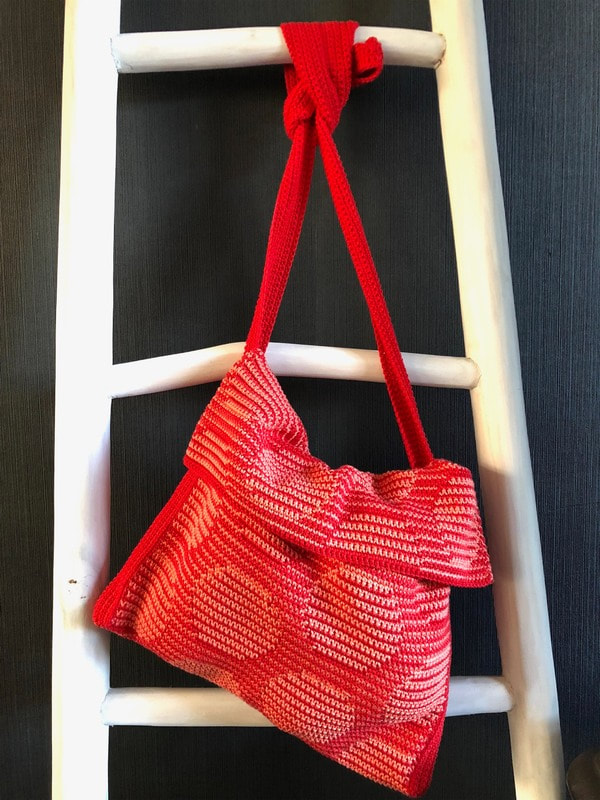
I proudly announce my first pattern with the illusion/shadow technique. I experimented a lot with it last year. I have looked at which yarn is suitable and which less. How get I the best out of this technique? (you can read a lot more about this here) This resulted in this bag in a new crochet technique for most people. ----------------------------------- Hier is hij dan, mijn eerste patroon met de illusie/schaduw techniek. Ik heb er vorig jaar flink mee geëxperimenteerd. Ik heb gekeken naar welk garen geschikt is en welke minder. En hoe komt de illusie het mooist uit, hoe haal ik het beste uit deze techniek. (hier lees je er nog veel meer over) Dit resulteerde in deze tas in een voor de meeste mensen een hele nieuwe haaktechniek. 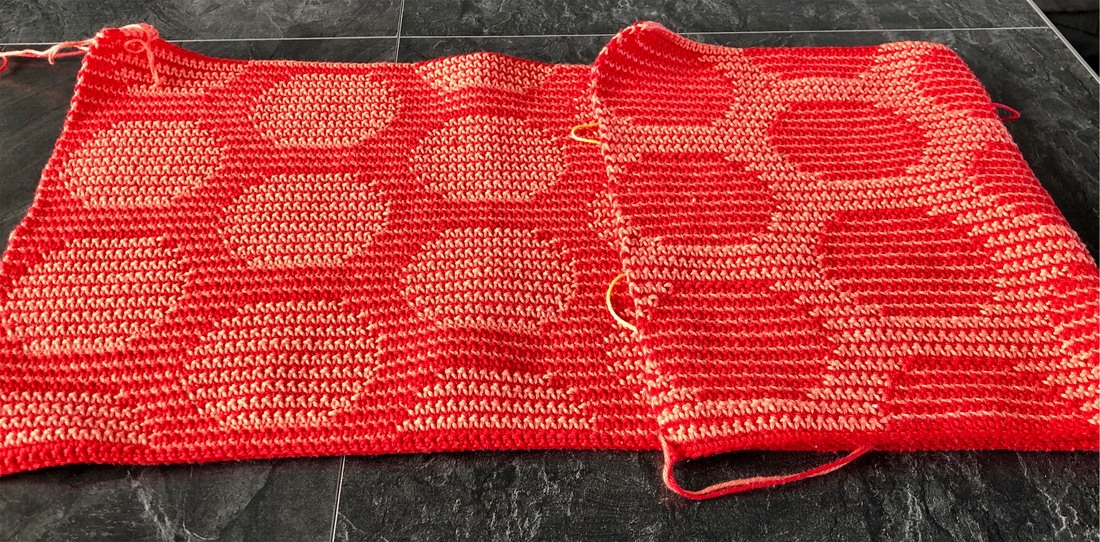
This technique is explained in this pattern. I think this pattern is suitable for the crocheter with some experience. Not because it is a very complicated pattern but there are 2 techniques, tapestry crochet, and illusion/shadow crochet and this can make it a bit challenging at first. But once you know how it works, it is wonderfully relaxed. Especially because I have added a schedule in which you can keep track of your rows and making it all very well-organized. ------------------------------------------------ In dit patroon wordt deze techniek uitgelegd. Ik denk dat dit patroon geschikt is voor de haker met wat ervaring. Niet omdat het een heel ingewikkeld patroon is maar je hebt te maken met 2 technieken, tapestry haken en illusie/schaduw haken en dit maakt het in eerste instantie een uitdaging. Maar heb je eenmaal door hoe 'het trucje' werkt dan is het een heerlijk ontspannen haakwerk. Helemaal omdat ik er een schema heb bij gedaan waarin je precies je toeren kunt bijhouden en waardoor het allemaal erg overzichtelijk blijft. 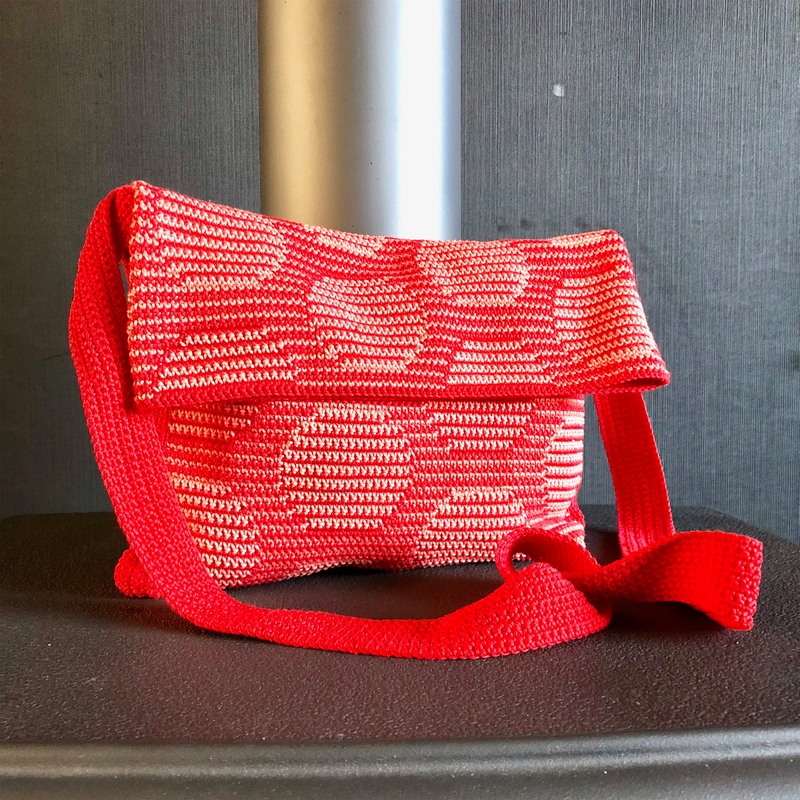
This bag is about 35 centimeters wide and 40 centimeters high. The handle is placed a bit lower because of this you can use the top of the bag as a flap. The handle is long so you can wear it as a crossbody bag. But if you prefer to be shorter than this is very easy to adjust. It is not necessary to provide the bag with lining because the bag is quite sturdy due to the technique used, but of course, it is possible! Marieke, who tested the bag has fed him, you can see it in the handle below. You can see how the bag looks in a very different color scheme. Marieke used the combination: Scheepjes Catona Charcoal (gray) color number 393 (5 x) and Bridal White color number 105 (3 x). I really love her bag! I am very curious about the combinations that you guys come up with. I would love to admire them when you place them somewhere online. Do not forget to tag me jellina creations or use #crazycircles so that I can find you! ------------------------------------------- De tas is een overslag tas van ongeveer 35 centimeter breed en 40 centimeter hoog. Hij sluit door middel van een overslag dwz dat het hengsel wat lager is geplaatst en je de bovenkant van de tas als flap gebruikt. Het hengsel is lekker lang waardoor je hem als crossbody tas kunt dragen. Maar wil je hem liever korter dan is dit heel eenvoudig aan te passen. Het is niet nodig om de tas te voeren omdat door de gebruikte techniek de tas vrij stevig en vast is, maar het mag en kan natuurlijk wel! Marieke, die de tas heeft getest heeft hem wel gevoerd, je kunt het hieronder zien in het hengsel. Je kunt nu meteen zien wat de tas doet in een heel andere kleurstelling. Marieke gebruikte de combinatie: Scheepjes Catona Charcoal (grijs) kleurnummer 393 (5 bollen) en Bridal White kleurnummer 105 (3 bollen). Zelf vind ik dit ook een hele mooie tas geworden! Ik ben heel erg benieuwd naar de combinaties die jullie verzinnen. Ik kom ze graag bewonderen wanneer je ze ergens online plaatst. Vergeet dan niet mij te taggen jellina-creations of gebruik #crazycircles zodat ik jullie kan vinden! 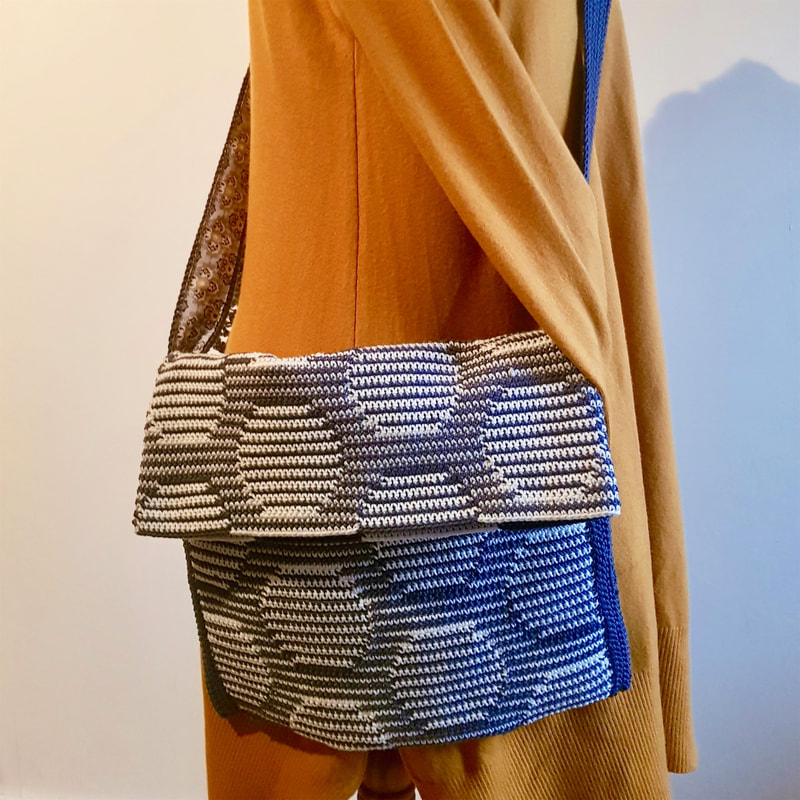
Practical Information
The yarn is availeble here Scheepjes dealers or here (affiliatie link) For the pattern push the button below
--------------------------------------
Praktische informatie Het garen is verkrijgbaar bij 1 van de Scheepjes dealers of kun je hier bestellen (affiliatie link) Voor het patroon druk je op onderstaande knop om in de winkel te komen. 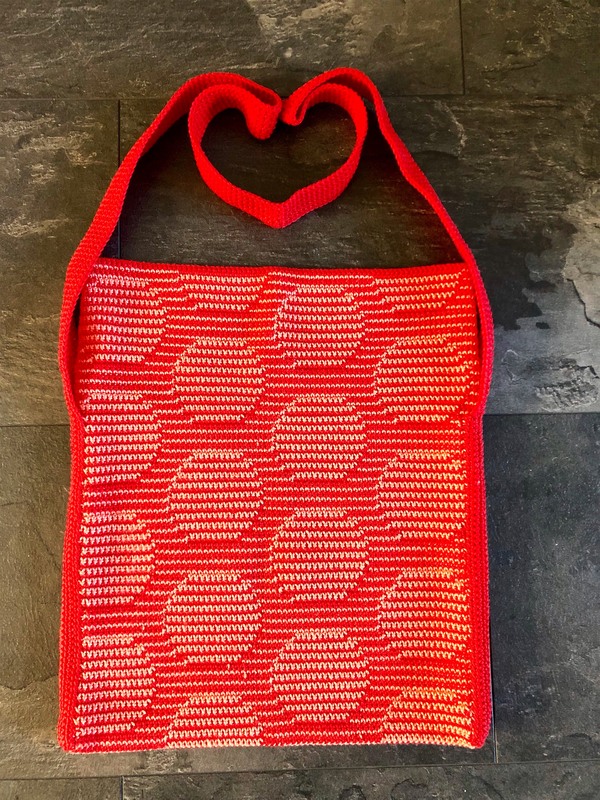
5 Comments
|

Ravelry
Wanneer je via onderstaande link je garen besteld gaat er een klein percentage naar mij zonder dat het jou een cent extra kost. Op deze manier kan ik mijn patronen gratis blijven aanbieden.
Dank je! 
|