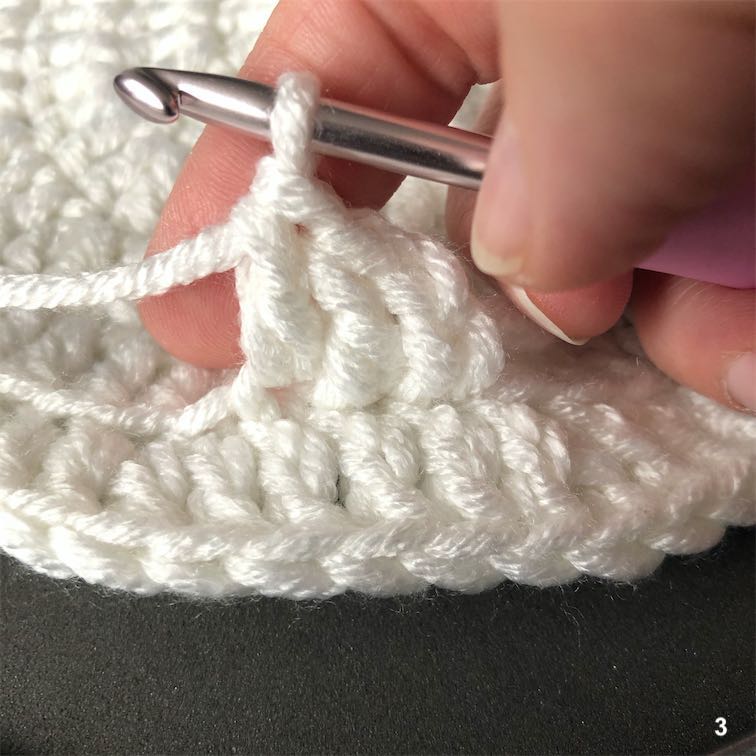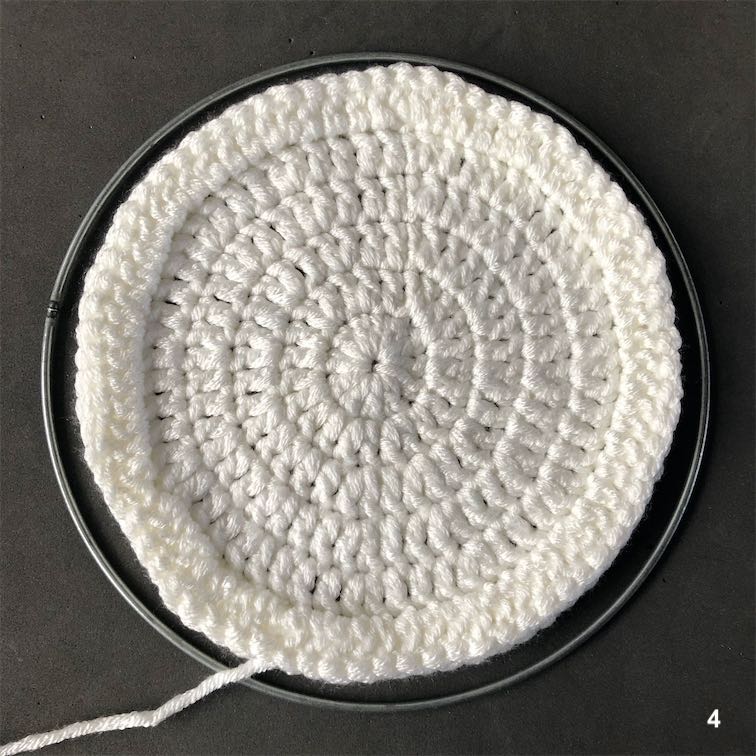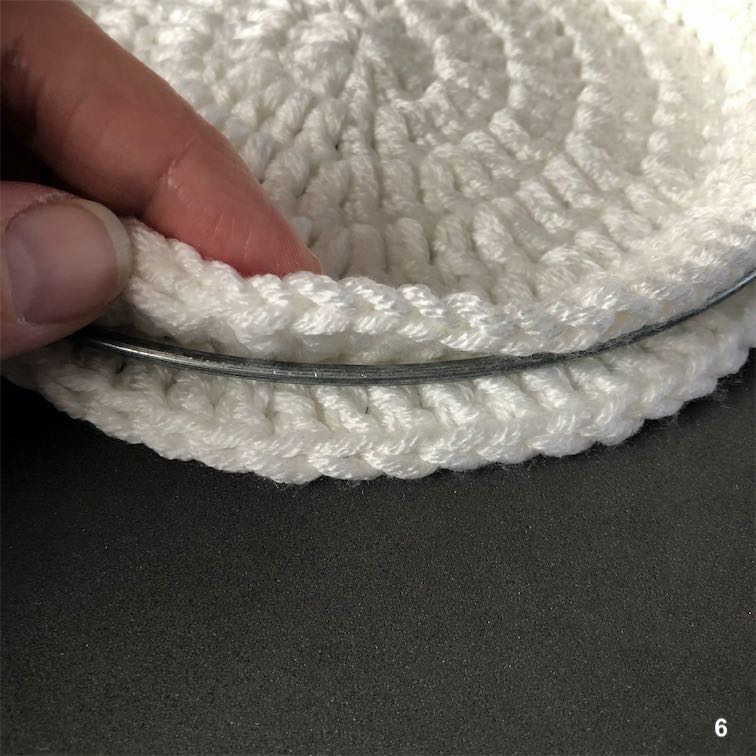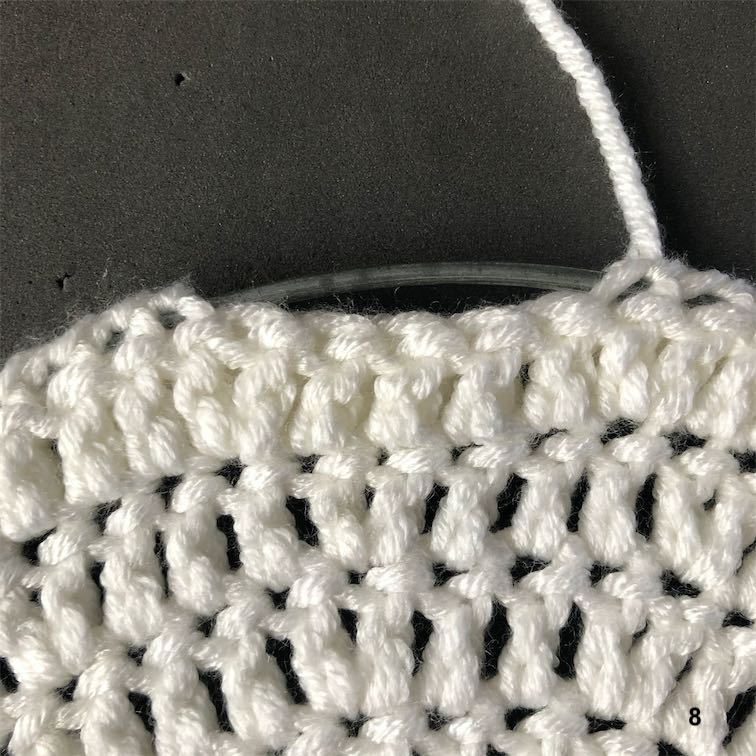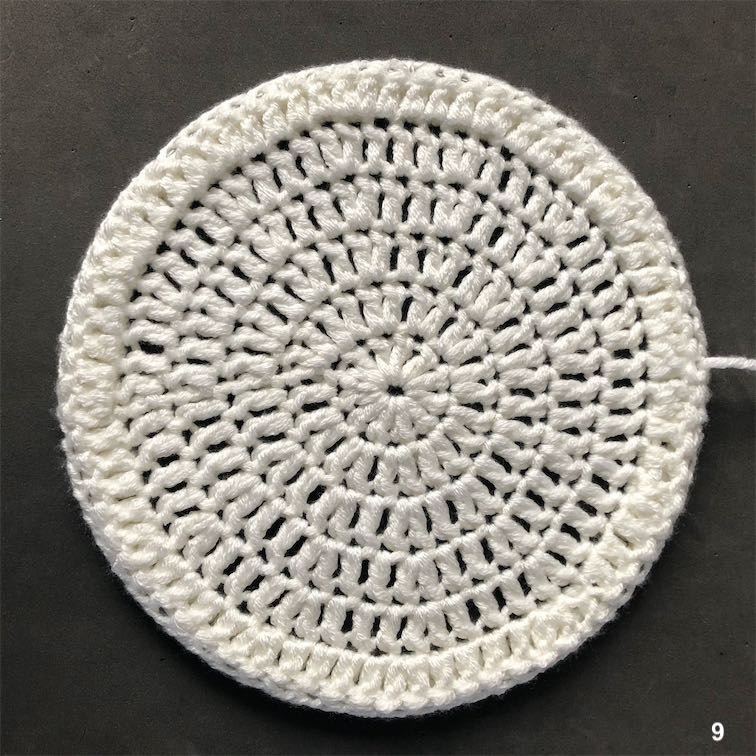
 After my blog post (read it here) about the Scheepjes RozetaCAL, (designed by Tatiana from Lilla Björn Crochet) in which I say I stopped after week 7 and decided to hang my round Rozeta on the wall, I got a lot of questions about how it hangs so nicely. That answer is fairly simple, I use a metal ring for it. How I did that I explain below with the help of 9 photos. (dc = us terms) -------------------------------- Omdat ik na aanleiding van mijn blogpost (hier te lezen) over de Scheepjes RozetaCAL, (ontworpen door Tatiana van Lila Björn Crochet) waarin ik vertel na week 7 te zijn gestopt en besloot om mijn ronde Rozeta aan de muur te hangen, kreeg ik veel vragen over hoe hij zo mooi strak hangt. Nu dat antwoord is vrij simpel, ik heb hem opgespannen met behulp van een metalen ring. Hoe ik dat precies deed leg ik hieronder uit met behulp van 9 foto's. Metal ringHow do I determine the correct size of the metal ring? The size of the ring for your mandala depends on: * The yarn used, is the yarn very elastic? Or do you have stiff yarn that hardly stretches? * How large is the mandala, small mandalas stretch much less than a mandala of almost a meter in diameter. To find out, it is best to first block your mandala globally. This does not have to be super neat and you do not have to make it wet either, but this is purely to see which size ring you need. When your mandala is pinned correctly ie it must be on tension but not on maximum tension. ---------------------------------------- Hoe bepaal ik de juiste maat ring Hoe groot de ring moet zijn voor je mandala is afhankelijk van: * De gebruikte garen, is het garen erg rekbaar? Of heb je juist stug garen wat bijna niet rekt? * Hoe groot is de mandala, kleine mandala’s rekken veel minder dan een mandala van bijna een meter in diameter.Om hier achter te komen is het het handigst om je mandala eerst globaal te blocken. Dit hoeft niet super netjes en je hoeft hem ook niet nat te maken, maar dit is puur om te kijken welke maat ring je nodig hebt. Wanneer je mandala goed is opgespeld dwz hij moet op spanning staan maar niet op maximale spanning. Je spant hem zo ver op als je hem in de ring wilt hebben. Verschillende maten ringen zijn hier * te bestellen. En hier vind je grote ringen. ---------------------------------- Photo 1 Measure the diameter and add about 4 centimeters, that is the diameter of the ring that you need. The 4 extra centimeters are for 2x1 centimeters for the last crochet round and the other 2x1 centimeters is to tension your mandala. For smaller mandalas such as in my example, only 2x half a centimeter is needed. So for a mandala of 17 centimeters I calculated a ring of 20 centimeters Photo 2 To enclose the metal ring, crochet a double edge of dc's as the last round. How to do: Crochet a row of dc's in the back loop, tie off your thread. Photo 3 Attach your thread to the front loop and now work a row of dc's in the front loop. Photo 4 You now have a mandala with a double last border. Photo 5 and 6 Place your ring between these 2 rows. Photo 7 Now sew the outer loops together with the overcast stitch. Photo 8 As you can see, your work is under tension. But in this way you get a nicely stretched mandala. Photo 9 Your Mandala is ready! ----------------------------------------- Foto 1 Meet de diameter en reken daar ongeveer 4 centimeter bij, dat is de diameter van de ring die je nodig hebt. De 4 extra centimeters zijn voor 2x1 centimeter voor de laatste gehaakte toer en de andere 2x1 centimeter is om je mandala af te spannen. Voor kleinere mandala's zo als in mijn voorbeeld is maar 2x een halve centimeter nodig voor het opspannen. Dus ik rekende voor een mandala van 17 centimeter een ring van 20 centimeter Foto 2 Om de metalen ring in te sluiten haak je een dubbele rand stokjes als laatste toer, hiertussen komt de metalen ring. rand haken: Haak een toer stokjes in de achterste lus, hecht je draad af. Foto 3 Hecht je draad aan aan voorste lus en haak nu een toer stokjes in de voorste lus. Foto 4 Je hebt nu een mandala met een dubbele laatste rand. Foto 5 en 6 Plaats je ring tussen deze 2 toeren. Foto 7 Naai nu met de overhandse steek steeds de buitenste lussen aan elkaar. Foto 8 Zoals je kunt zien staat je werk best op spanning. Maar op deze manier krijg je een mooi opgespannen mandala. Foto 9 Klaar is je Mandala!  Of course, there are even more possibilities how to make a mandala into a wall hanging but this is the method of how I do it. I hope this tutorial was clear. Do you have any questions please ask them! ------------------------------- Natuurlijk zijn er nog meer mogelijkheden om een mandala op te spannen maar dit is de methode hoe ik het doe. Ik hoop dat deze tutorial duidelijk was. Heb je nog vragen stel ze gerust! *affiliatie link
10 Comments
|

Ravelry

Wanneer je via onderstaande link je garen besteld gaat er een klein percentage naar mij zonder dat het jou een cent extra kost. Op deze manier kan ik mijn patronen gratis blijven aanbieden.
Dank je! 
|